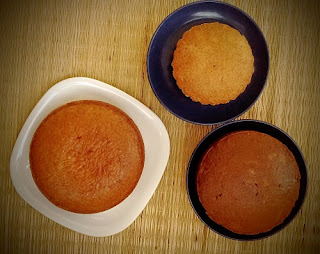
Pav Buns
 |
| Pav Buns |
Another one, on my bread baking to do list – done, Yay !
This one, I am super happy and proud of. Unless I told someone these are home
made, they would easily pass off as store bought. Try these and you would
definitely get hooked on to bread baking, just like me.
Tuesday morning breakfast of pav bhaji with home-made pav
buns, aah bliss.
Recipe
Prep Time 120
minutes
Cook Time 30
minutes
Servings 9
nos
INGREDIENTS
2 and 1/2 cups All purpose flour
2 tsps Instant yeast
2 tsps Sugar
1 tsp Salt
2 tbsps Unsalted butter [ melted]
1/2 cup warm water
1/2 cup warm milk
Milk butter and for brushing the top
INSTRUCTIONS
- Sift the flour and salt together. Set aside.
- Mix the warm water and warm milk. Take 1/4 cup from this, for activating the yeast.
- Yeast activation- Mix the yeast, 1 tsp of sugar and 1/4 cup of water-milk mixture. Set aside for 5-10 minutes, until the yeast turns frothy.
- In a large glass bowl mix the remaining water-milk mixture and sugar.
- Add the frothy yeast and 1/2 cup of the sifted flour. Mix with a spatula for a minute. Close with a lid and set aside for 5 minutes. [ the mixture at this point will be very wet and sticky]
- Add another 1/2 cup of sifted flour. Mix well with a spatula and allow to rest for 10 minutes.
- After 10 minutes, mix once again and add the remaining flour.
- Start to knead the dough. [ You would find that the dough isn't too sticky by now]
- Add the melted butter and knead for 3-5 minutes.
- Grease a large bowl and keep the kneaded loose ball of dough in it. Turn it around in the bowl, so that it's surface is evenly greased too.
- Cover the bowl with a damp cloth and keep it in a warm place, until the dough doubles in size. [ It took about 45 minutes for me]
- Deflate or punch down the dough gently, and knead for a minute or two.
- Divide the dough into nine equal parts.
- Roll each portion, between your palms, into a neat circular ball.
- Place them, on a greased and lined baking tray. [ Give a little gap between each ball of dough, to give them enough space to expand].
- Grease or brush the top with little melted butter and cover with a damp cloth, for the second proofing. [ it took about 1/2 an hour for me]
- Pre heat the oven at 180 C for 10 minutes. [ do this around the time the dough has almost doubled]
- Brush the top of the rolls, with milk and bake them at 170 C for 25-30 minutes [ or until the top becomes a lovely golden brown].
- Remove from the oven and transfer on to a cooling rack.
- Let them cool completely before you decide to pounce on them.
- Store them in an air tight container once completely cooled.

RECIPE NOTES
- Oven temperature and time may vary. I baked mine in the bake mode and on the middle rack. Check for the top to turn a lovely golden brown, to know when it's done.
- Though I used instant yeast, which can directly be added to the flour, I find the above method very efficient. In case you are using active dry yeast, follow the same steps as above.
- The resting phase for 5 minutes and 10 minutes, after adding a part of the flour, made kneading very easy and less messy. I found that i wasn't dealing with a sticky mess and the result is by far, my best.
- I have also posted a simple pav- bhaji recipe [ under breakfast and brunch] that would go very well with these rolls. Give it a shot and impress your loved ones.
Happy Baking
Posted originally on FEBRUARY 9, 2016

Comments
Post a Comment